Friday, August 24, 2012
Purple Pumpkin: Washi Tape Giveaway!
Purple Pumpkin: Washi Tape Giveaway!: As promised, here is our new Washi Tape Giveaway!! Washi Tape is the newest addition to the Purple Pumpkin store. We have 50 ...
Wednesday, May 2, 2012
Meant to be....

For this layout I had one of those wonderful photo strips from a photo booth in the mall.(LOVE PHOTO BOOTHS) I used the Colorbok Lovey Dovey page kit. (Big Lots $3.00) The paper, green stickers journaling cards and the phrases are from the kit. The bird and green flowers are Prima. I used 2 of The Little Yellow Bicycles Clear Cut shapes from Baby Safari glittery swirls in the corners. The pink flowers are from Michael's Crafts dollar bins. The white letter stickers are Making Memories 7/16 in funky white. I inked the edges with a Creative Living ink dauber in Sour Apple. For writing and the journaling cards and outlining the green letters I used a Zig pen in Salmon. I used pink Dew Drops and green washi tape. The heart shaped stickpins are by Dritz.The lace, rose trim, pink ribbon and the brads I got out of lots and do not know the manufactures names.
I really like how this turned out and hope you do too:)
Saturday, April 7, 2012


The next card I made for my daughter Adrianna who will be 14 on the 10th. Can't believe she is that old already! Time flies.... I cut the card shape on the Shilouette SD. I used black card stock and DCWV Far East papers. I used Tattered Angel's Glimmer Mist in Moonlight on the paper and the roses. Nor sure of the paper rose brand as I bought it in a lot:) The ribbon roses are from Walmart the were light blue but glimmer mist fixed that too. I used several of Studio G's gem in a medium blue. The numerals 14 are cut from black card stock using Quickutz Chop Sticks dies. I used Cat's eye ink around the edges in frost blue. A piece of white lace from Walmart finished it up.
I really enjoyed making these cards today and hope you enjoyed seeing them:)
Saturday, March 10, 2012
Twine storage:)

I have a quick post on an idea I thought was pretty neat. I picked up pairs of salt and pepper shakers at the Dollar Tree for a buck! I then wrapped The Twinery's twine around a pencil and shoved it inside and ran the twine out the center hole on the top. I used the labels that came with the twine by running them through my Xyron "X". I think these labels are very pretty. I picked up a small wood shelf (not pictured) for a couple bucks at a local thrift shop! So these make a lovely little rainbow on my wall:)
A cheap, pretty storage solution! Hope you try it out!
Tuesday, February 7, 2012
Valentine

First I cut the card out of red card stock with my Silhouette. I then sprayed Tattered Angels Glimmer Mist in Gold (first time I have ever used Glimmer Mist!) for a mottled look. I backed the card with black card stock and glue them together with a Zig glue pen. I then used a piece of shiny black card stock with three pieces of Washi Tape (from Wishy Washi Tape, new thing I LOVE IT!) to mostly cover it and rounded the corners. I cut the letters out of DCWV glitter card stock in white (hard to see in photo) with Quickutz Mademoiselle dies. I then attached it to the card and wrapped The Twinery's Charcoal twine with a little bow. For the flowers I put pieces if Washi tape on plain white paper and punched them out. I added a pearl from Want 2 Scrap's Say it with Pearls. I had a lot of fun making this and hope you enjoy it:)
Thursday, February 2, 2012
Silhouette Dust Cover

This was a pretty quick project. I made it in under an hour. I used some pink fabric, vintage lace, and black ribbon. The bow and the little silver rose button are hot glued on.
Hope you like it.. You should try it fun and quick:)
Monday, January 23, 2012
Card for Dylan.


For this card I used a standard rectangle card and envelope in white. I cut the leaf paper to fit the front. I don't know the manufacturer of the paper as, I buy lots off of eBay and not everything has a name on it. Then I inked around the edges with a Colorbox Fluid Chalk Ink pad in aquamarine. I then stamped the Owls from Hampton Arts Mini flip stamp book on white card stock. I colored them with Copics markers: YR18, E57, Y17, YG6, Y28, Y000, Y02, E53, YG95, B24, G17, and GY95. Then, I cut them out. I tried to make the owls pop just a bit. I also, used pop dots to raise then up. I then stamped the legs on the paper. The fence is from this same stamp set. I stamped on white card stock with Creative Living Ink dauber in Toasted Almond. I cut it out and used a Zig pen to add lines and make it stand out a bit more. For the banner I used The Twinery's Cappuccino twine and cut tags out with the Slice Basic Shapes 1. I inked around the edges with the Artichoke ink dauber and then used the leaf border from the stamp set to make the leaves with and Ebony dauber. I cut the rectangle piece of Kraft card stock out the rounded the corners with a corner punch. Inked the edges and added a piece of Craft Essentials Rick rack in Moss. For the inside I used a Studio g stamp ($.97 at Wal-Mart) and colored this Owl with the Copics too. Both of the sentiment are from the owl mini flip book of stamps.
I did learn a interesting little fact, Hampton Arts makes the Studio G line..... I love the OWLS:)

Wednesday, January 11, 2012
Anniversary Card


I used a standard 7X7 red card. Just something I have picked up at a yard sale you got in a lot off of Ebay. Then I took Darice 5/8" Ecru Beading Ribbon and cut to length and "painted" it on with Scotch Quick-Dry Adhesive. Love this glue! Dry quick and clear and adds a bit of shine. The ribbon is held on really good. It did warp the paper a bit, but a quick ironing can fix that. Then I took white card stock used a border punch and inked the edges with black ink. The stamp is Stampology, Between The Lines. I colored it in with Copic markers: R29 Lipstick Red, 100 Black, and BG45 Nile Blue. Then I tied a bow with The Twinery's Caribbean twine. A piece of black ribbon with white polka dots finished it off.
I wish I would have had more time to fancy it up a bit. But being for a man simple is probably better. I really did like the ribbon backgound and wanted to shared that with you:)
Sunday, January 8, 2012
Amazing!


Anyway, this picture of my son was taken over the Christmas break just one of those days sitting around talking and I snapped a picture and I absolutely love this picture. I captures his personality so well. Looking at this makes me realize how truly blessed I am to have this amazing boy in my life:)
I printed the picture in full color and also in black and white and sepia tone. Matted them on white card stock and inked around the edges with brown ink. The background paper is a printed sheet from Sandylion called One-Of-A- Kind Blue. The border is actually stiffened canvas that I cut the shape out of and mounted to the paper. I then took glitter glue and went all around the inside of the shape. Also, 3 glitter glue dots in each corner. I cut the letters for AMAZING and the flourishes out with the Slice Machine using the Basics 3 cart. I then wrapped The Twinerys Cappuccino twine around the letters. And added a bit of bling to the flourishes. The "as you are" is the Sizzix Scrip dies. The tag is a chipboard circle that I added a bit of glitter glue to cover up green dots (didn't match my colors:) and added a bit to the stars. I inked around the edges with the same brown ink and added a small metal heart charm with a twine bow.
Thanks for looking I really enjoyed making this page for my son.
Friday, January 6, 2012
First page of the year!


I have completed my first page of the year. I also got to try using twine for the first time. My mom bought me some of The Twinery's twine for Christmas:)
The Picture for this page was taken with my Ipod so not very clear, but seeing how I forgot to get out the camera this is the only picture I took. Still can believe I didn't take any more pictures. Anyway, I inked around my background page with tea stain ink. I cut the tree out with the Silhouette SD. I added Stickles (red) and Studio G glitter glue.
I matted the picture and used a border punch all the way around it. Then inked the edges in white. Added some great twine and a little ornament button.
I am a big fan of ribbon and love to put it on my pages and why only use one when I can use 3! I used some eyelet lace, some dark green ribbon and some super wide red rickrack. The journaling tag I made with a 2in. circle punch. I also punched out 3 flowers with a 2 1/2 in. flower punch to get the scalloped edge. (Need to by a scalloped circle punch!) I inked around the edges in white and added a cute Martha Stewart stamp in red.
Thank you for looking!
Wednesday, January 4, 2012
I new at this......
Ok, I have decided that one of my New Years Resoulitions is to try blogging out:) Not sure how offten I will be able to post but I am going to try for at least once a week. So lets see how it goes:)
I am a Scrapbooker. I also work full time so, I don't get to scrap as much as I like. My next project is goin to involve some time that my wonderful Mom got me for Christmas. So I will be back soon to post a project. If I figure out how! LOL
I am a Scrapbooker. I also work full time so, I don't get to scrap as much as I like. My next project is goin to involve some time that my wonderful Mom got me for Christmas. So I will be back soon to post a project. If I figure out how! LOL
Subscribe to:
Posts (Atom)
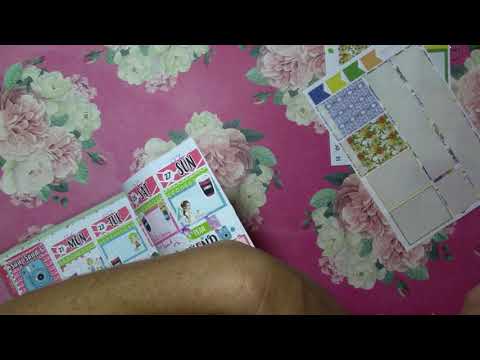
Plan With Me Recollections Planner Ft: Mint Leaf Prints, The Polka Dot P...
This week in my Recollections Planner I used the last of my summery kits. This Citrus Garden kit by Mint Leaf Prints is so pretty. I love th...
-
This week in my Recollections Planner I used the last of my summery kits. This Citrus Garden kit by Mint Leaf Prints is so pretty. I love th...
-
Hello! It's been a while sheesh, work gets in the way:) I have a quick post on an idea I thought was pretty neat. I picked up pairs ...
-
Hello :) It is July!!!! For me that means the 4th and...... My Birthday!!!! I love birthdays, so much better than the other option...none! T...


